
The Honeywell TH8320R1003 is a VisionPRO 8000 series thermostat, offering a touch-screen interface and RedLINK technology for efficient home comfort control․ Designed for user-friendly operation, it ensures energy efficiency and convenience․
1․1 Overview of the Honeywell TH8320R1003 Thermostat
The Honeywell TH8320R1003 is a cutting-edge programmable thermostat from the VisionPRO 8000 series, designed to provide precise temperature control and energy efficiency․ It features a user-friendly touch-screen interface and RedLINK technology, enabling seamless integration with smart home systems․ This thermostat supports 3H/2C systems and offers flexible programming options, including 7-day scheduling․ Its compatibility with HVAC systems ensures reliable performance, while the on-screen guided setup eliminates the need for complicated manuals․ With remote access capabilities and energy-saving modes, the TH8320R1003 is an ideal solution for modern homeowners seeking convenience and efficiency․ Its advanced features, such as customizable settings and alerts, make it a standout choice for managing home comfort effectively․
1․2 Key Features of the TH8320R1003
The Honeywell TH8320R1003 boasts an array of innovative features, including a high-resolution touch-screen display for intuitive control․ Its RedLINK technology ensures wireless communication with compatible HVAC systems and accessories, enhancing system performance․ The thermostat supports 3H/2C systems and offers 7-day programmability for tailored temperature settings․ Energy efficiency is maximized through features like energy savings mode, which optimizes heating and cooling usage․ Additionally, it is compatible with smart home systems, allowing for remote access and control via the Honeywell Home app․ Customizable settings enable users to personalize comfort preferences, while the on-screen guided setup simplifies installation and configuration․ These features make the TH8320R1003 a versatile and user-friendly solution for modern home comfort needs․
1․3 Benefits of Using the TH8320R1003
The Honeywell TH8320R1003 offers numerous benefits, including enhanced energy efficiency and customizable comfort control․ Its RedLINK technology enables seamless communication with HVAC systems and accessories, ensuring optimal performance․ The 7-day programmability allows users to tailor temperature settings to their schedules, reducing energy waste․ Energy savings mode further optimizes heating and cooling usage, lowering utility bills․ Remote access via the Honeywell Home app provides convenience, letting users adjust settings from anywhere․ The thermostat’s compatibility with smart home systems integrates effortlessly with other devices, enhancing home automation․ Additionally, the large backlit display and on-screen guided setup simplify operation, making it user-friendly․ These features combine to deliver a reliable, efficient, and modern solution for home climate control․
Pre-Installation Requirements
Ensure HVAC system compatibility, gather tools, and review wiring diagrams․ Verify power requirements (C wire or battery) and install wallplate at 5 feet for optimal performance and appearance․
2․1 Compatibility Check for Your HVAC System
Before installing the Honeywell TH8320R1003, ensure your HVAC system is compatible․ The thermostat supports heating (up to 3 stages) and cooling (2 stages) systems․ Compatibility extends to dual-fuel systems, heat pumps, and humidifiers/dehumidifiers․ Verify your system’s voltage requirements—24VAC or 120/240VAC․ Check if a C wire is present or if a wire saver is needed․ For systems with multiple transformers, remove the factory-installed jumper․ Ensure the system transformer can handle the thermostat’s power needs․ If unsure, consult a professional to avoid installation errors․ Proper compatibility ensures smooth operation and optimal performance of your HVAC system with the TH8320R1003 thermostat․
2․2 Tools and Materials Needed for Installation
To install the Honeywell TH8320R1003 thermostat, gather the necessary tools and materials․ You will need a screwdriver (both Phillips and flathead), a drill with bits, a pencil, a level, and wire strippers for trimming wires․ Ensure you have wall anchors and screws for mounting the wallplate․ If your system requires a C wire, have a wire saver or a C wire adapter ready․ For dual-transformer systems, remove the factory-installed jumper․ Keep the installation manual handy for reference․ Verify compatibility with your HVAC system before starting․ Proper tools and materials ensure a smooth and safe installation process․ If unsure about any component, consult a professional to avoid errors․
2․3 Understanding the Wiring Diagram
The wiring diagram for the Honeywell TH8320R1003 thermostat is crucial for a successful installation․ It outlines the connections between the thermostat and your HVAC system․ Identify the terminals (R, C, W, Y, G, O, B, etc․) and their functions․ The R terminal connects to the heating system’s power, while C is the common wire, essential for powering the thermostat․ If your system lacks a C wire, use a wire saver or adapter․ For dual-transformer systems, remove the factory-installed jumper․ Refer to the diagram to connect wires correctly, ensuring no loose connections․ Miswiring can lead to system malfunctions․ If unsure, consult a professional or the installation manual․ Proper wiring ensures safe and efficient operation of your thermostat and HVAC system․ Always follow the manufacturer’s guidelines to avoid errors․
Installation Steps
The installation involves preparing the site, mounting the wallplate, connecting wires, and finalizing the setup․ Follow the wiring diagram and manufacturer’s instructions for a smooth process․ Ensure all connections are secure and test the thermostat post-installation․
3․1 Preparing the Site for Thermostat Installation
To prepare the site, locate the optimal position for the thermostat, typically 5 feet above the floor․ Ensure the area is clean and free from obstructions․ Turn off the HVAC system at the circuit breaker to avoid power-related issues․ Remove the existing thermostat and carefully label the wires using the provided wire labels․ This step is crucial for accurate connection later․ If necessary, install a C-wire or use the Wire Saver to power the thermostat․ Finally, level the wallplate and mark the mounting holes with a pencil for precise installation․ Always refer to the wiring diagram in the manual to ensure compatibility and safety․ Proper preparation ensures a seamless and error-free installation process․
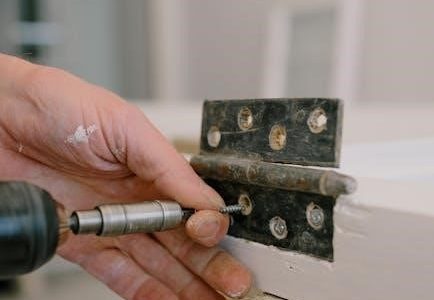
3․2 Mounting the Wallplate
To mount the wallplate, ensure it is level and positioned correctly for a clean installation․ Use a pencil to mark the mounting holes on the wall, ensuring they align with the wallplate’s screw holes․ Drill pilot holes if necessary, then insert wall anchors to secure the screws․ Gently place the wallplate over the holes and screw it into place using the provided screws․ Make sure the wallplate is tightly fastened but avoid overtightening, which could damage the plate or the wall․ Once mounted, double-check that the wallplate is level and secure․ This step ensures a stable base for the thermostat, allowing it to function accurately․ Proper alignment and leveling are crucial for both appearance and functionality․ Ensure the area around the wallplate is clean and dry before proceeding to the next steps․
3․3 Connecting the Wires
Connecting the wires is a critical step in the installation process․ Ensure the power to your HVAC system is turned off at the circuit breaker before proceeding; Identify the wires from your existing thermostat and match them to the corresponding terminals on the TH8320R1003 wallplate․ The C wire (common wire) or Wire Saver is required for RedLINK accessory functionality․ Refer to the wiring diagram in the manual to ensure proper connections․ Gently insert each wire into the correct terminal, securing it firmly․ Avoid forcing wires into incorrect terminals, as this could damage the thermostat․ Double-check all connections for accuracy and ensure they are snug․ Once all wires are connected, proceed to secure the thermostat to the wallplate․ If unsure, consult the manual or seek professional assistance․ Proper wiring ensures reliable performance and prevents potential issues with your HVAC system․ Always verify connections before restoring power․
3․4 Finalizing the Thermostat Installation
Once the wires are securely connected, carefully mount the thermostat to the wallplate, ensuring it is level for proper operation․ Use the provided screws to secure it firmly․ Restore power to your HVAC system at the circuit breaker․ Turn on the thermostat and check the display to ensure it powers up and functions correctly․ Test all buttons and features to confirm they respond as expected․ If the screen remains off, verify that the power source is correctly connected․ Finally, ensure the thermostat is properly aligned and level for an aesthetically pleasing installation․ Refer to the manual for any additional adjustments or calibrations required․ Once everything is verified, your Honeywell TH8320R1003 thermostat is ready for configuration and use, providing efficient temperature control for your home comfort system․
3․5 Testing the Thermostat After Installation
After completing the installation, power on the HVAC system and ensure the thermostat display activates․ Test all buttons and features, such as temperature adjustment and mode selection․ Verify the system responds correctly to thermostat commands, including heating, cooling, and fan modes․ Check for proper communication with RedLINK accessories if installed․ Ensure the screen remains illuminated as expected and that all functions operate smoothly․ Review the installation manual for specific testing procedures or additional calibrations required․ Confirm that the thermostat is level and securely mounted for accurate operation․ Lastly, verify that all wired connections are secure and functioning as intended․ This thorough testing ensures the Honeywell TH8320R1003 is ready for efficient and reliable performance in controlling your home’s climate․
Configuration and Setup
Configure your Honeywell TH8320R1003 with ease using the touch-screen interface․ Program schedules, set preferences, and integrate RedLINK accessories for enhanced functionality․ On-screen guidance simplifies setup without manuals, ensuring seamless smart home integration․
4․1 Initial Setup and Programming
The Honeywell TH8320R1003 thermostat offers a user-friendly initial setup process․ Upon installation, the thermostat guides you through on-screen instructions to configure basic settings such as temperature preferences, time zones, and system type․ Programming schedules is straightforward, allowing you to customize heating and cooling cycles based on your daily routine․ The touch-screen interface simplifies navigation, eliminating the need for complex manuals․ Additionally, the thermostat supports RedLINK accessories, enabling seamless integration with other Honeywell devices․ Initial programming ensures optimal performance and energy efficiency, making it easy to tailor your home comfort system to your specific needs․
4․2 Setting Up Schedules
Setting up schedules on the Honeywell TH8320R1003 thermostat is a seamless process designed to optimize energy usage and comfort․ The thermostat allows you to create custom heating and cooling schedules based on your daily routines․ Through the touch-screen interface, you can program temperature settings for different times of the day, ensuring your home is comfortable when you need it most․ The system supports up to seven-day programming, enabling you to tailor settings for each day of the week․ Additionally, the thermostat offers pre-programmed schedules that you can customize to suit your preferences․ By setting up schedules, you can achieve significant energy savings while maintaining consistent home comfort․ The interface provides clear guidance, making it easy to adjust schedules as needed․ This feature ensures your HVAC system operates efficiently, aligning with your lifestyle and energy goals․
4․3 Configuring RedLINK Accessories
Configuring RedLINK accessories with the Honeywell TH8320R1003 thermostat enhances its functionality by enabling wireless communication with compatible HVAC equipment․ The RedLINK technology allows seamless integration with devices like humidifiers, dehumidifiers, and ventilators․ To configure RedLINK accessories, ensure the thermostat is installed and powered correctly․ Use the on-screen menu to navigate to the accessories setup section․ Select the type of accessory you wish to connect, such as a humidifier or ventilator, and follow the guided prompts․ The system will automatically detect and pair with compatible devices․ For optimal performance, ensure a stable power supply, either through a C wire or battery power․ Proper configuration ensures synchronized operation of your HVAC system, improving overall home comfort and energy efficiency․ Always refer to the accessory’s installation guide for specific requirements and compatibility․

Advanced Features
The Honeywell TH8320R1003 offers advanced features like energy-saving modes, remote access, and customizable settings, ensuring enhanced control and efficiency for your home comfort system․
5․1 Energy Savings Mode
The Honeywell TH8320R1003 features an Energy Savings Mode designed to optimize energy consumption while maintaining comfort․ This mode adjusts heating and cooling usage based on your schedule and preferences, ensuring minimal energy waste․ By learning your home’s temperature patterns, it automatically switches to energy-saving temperatures during periods of inactivity or when you’re away․ This intelligent feature helps reduce utility bills and environmental impact without compromising comfort․ Users can easily customize settings to balance energy savings with their lifestyle needs․ The thermostat also provides insights into energy usage, helping you make informed decisions․ With the Energy Savings Mode, homeowners can enjoy both efficiency and convenience, making it a standout feature for eco-conscious users․ This mode is a key component of the thermostat’s advanced capabilities, aligning with Honeywell’s commitment to innovative, energy-efficient solutions․
5․2 Remote Access and Smart Home Integration
The Honeywell TH8320R1003 offers seamless remote access and smart home integration, allowing users to control their thermostat from anywhere using a smartphone or tablet․ Through the Honeywell Home app, homeowners can adjust settings, monitor energy usage, and receive alerts․ This feature ensures convenience and energy efficiency, as users can modify temperatures even when away from home․ The thermostat is compatible with major smart home systems, enabling voice control and integration with other devices․ This connectivity enhances the overall home comfort experience, providing a modern and streamlined solution for temperature management․ The ability to integrate with smart home ecosystems makes the TH8320R1003 a versatile choice for tech-savvy users seeking advanced control over their environment․ Remote access and smart home integration are key features that set this thermostat apart in terms of functionality and user experience․
5․3 Customizable Settings
The Honeywell TH8320R1003 offers a range of customizable settings to tailor your comfort experience․ Users can adjust temperature setpoints, fan modes, and system operations to suit their preferences․ The thermostat allows for precise control over heating and cooling stages, ensuring optimal performance․ Additionally, the dead band feature helps maintain consistent temperatures by setting a range around the desired setpoint․ Customizable scheduling options enable users to program temperature changes throughout the day, enhancing energy efficiency․ The thermostat also supports adjustable temperature limits, preventing extreme settings that could waste energy․ With its user-friendly interface, users can easily personalize settings to balance comfort and energy savings․ These customizable features make the TH8320R1003 a flexible solution for various home comfort needs, allowing for a personalized experience that adapts to different lifestyles and preferences․
Maintenance and Troubleshooting
Regular maintenance ensures optimal performance of the Honeywell TH8320R1003․ Clean the screen and check wiring connections periodically․ For issues, refer to the troubleshooting guide in the manual or reset the thermostat․
6․1 Routine Maintenance Tips
To maintain the Honeywell TH8320R1003 thermostat, clean the touchscreen regularly with a soft cloth to prevent dust buildup․ Check and tighten all wire connections to ensure proper functionality․ Replace the batteries if the display dims or becomes unresponsive․ For systems with a C-wire, ensure it is securely connected to prevent power issues․ Additionally, update the thermostat software periodically to benefit from the latest features and improvements․ Regularly review and adjust schedules to optimize energy usage․ Inspect the wallplate for any damage or wear and replace it if necessary․ By following these routine maintenance tips, you can extend the lifespan of your thermostat and ensure it continues to perform efficiently․
6․2 Common Issues and Solutions
One common issue with the Honeywell TH8320R1003 is a blank or unresponsive touchscreen, often caused by loose wire connections or low battery levels․ To resolve this, ensure all wires are securely connected and replace the batteries if necessary․ Another issue is the thermostat failing to switch between heating and cooling modes, which may be due to incorrect wiring or a malfunctioning HVAC system․ Check the wiring against the installation manual and verify that the HVAC system is functioning properly․ If the display light is too dim or bright, adjust the backlight settings through the menu․ For connectivity problems with RedLINK accessories, ensure the devices are properly paired and within range․ Refer to the user manual for detailed troubleshooting steps and reset options if issues persist․ Regular maintenance can help prevent many of these problems․
6․3 Resetting the Thermostat
Resetting the Honeywell TH8320R1003 thermostat can resolve various issues, such as unresponsiveness or incorrect settings․ To perform a factory reset, press and hold the “Menu” button for 10 seconds until the display goes blank, then release․ The thermostat will restart, restoring default settings․ Note that this will erase all programmed schedules and preferences, so they will need to be reconfigured․ If the thermostat is unresponsive, ensure the power is on and wires are securely connected․ For minor issues, a soft reset can be done by removing the batteries for 30 seconds or disconnecting power temporarily․ Always refer to the user manual for specific reset instructions tailored to your system․ Regular resets can help maintain optimal performance and troubleshoot persistent problems effectively․
The Honeywell TH8320R1003 offers advanced features, energy efficiency, and seamless smart home integration, making it a top choice for modern heating and cooling control․
7․1 Summary of Key Points
The Honeywell TH8320R1003 thermostat is a VisionPRO 8000 series model, offering advanced features like a touch-screen interface, RedLINK technology, and energy-saving capabilities․ It supports smart home integration and remote access, ensuring convenient control over your HVAC system․ The thermostat is designed for easy installation, with a comprehensive manual guiding users through setup, wiring, and configuration․ Key features include programmable scheduling, customizable settings, and compatibility with various HVAC systems․ Proper installation requires checking system compatibility and understanding the wiring diagram․ Routine maintenance and troubleshooting tips are provided to ensure optimal performance․ With its user-friendly design and energy-efficient operation, the TH8320R1003 is a reliable choice for modern home comfort systems․ Always refer to the manual for detailed instructions and support․
7․2 Final Thoughts on the TH8320R1003
The Honeywell TH8320R1003 stands out as a versatile and efficient thermostat, combining advanced features with ease of use․ Its RedLINK technology and smart home integration make it a top choice for modern households․ The comprehensive installation manual and user-friendly interface ensure a smooth setup process․ With energy-saving modes and customizable settings, it offers both comfort and cost efficiency․ While installation requires careful attention to wiring and system compatibility, the provided instructions guide users through each step; Overall, the TH8320R1003 is a reliable and innovative solution for home temperature control, backed by Honeywell’s reputation for quality and durability․ For optimal performance, regular maintenance and updates are recommended to keep the thermostat functioning at its best․
7․3 Future Updates and Support
The Honeywell TH8320R1003 is designed to receive future software updates, ensuring it remains up-to-date with the latest features and technologies․ These updates can often be downloaded directly through the thermostat or via the Honeywell Home app, enhancing performance and functionality․ Additionally, Honeywell provides comprehensive customer support, including online resources, troubleshooting guides, and dedicated customer service teams․ Users can access detailed documentation, installation manuals, and FAQs on Honeywell’s official website․ The thermostat also comes with a warranty, offering protection and peace of mind for owners․ Regular updates and robust support ensure the TH8320R1003 continues to deliver reliable and efficient temperature control for years to come․ Honeywell’s commitment to innovation and customer satisfaction makes this thermostat a long-term investment for home comfort․