
Welcome to the world of free oval crochet doily patterns with written instructions! Discover beautiful, versatile designs perfect for beginners and experienced crocheters alike․ Learn how to create stunning doilies using easy-to-follow patterns․
1․1 What Are Crochet Doilies?
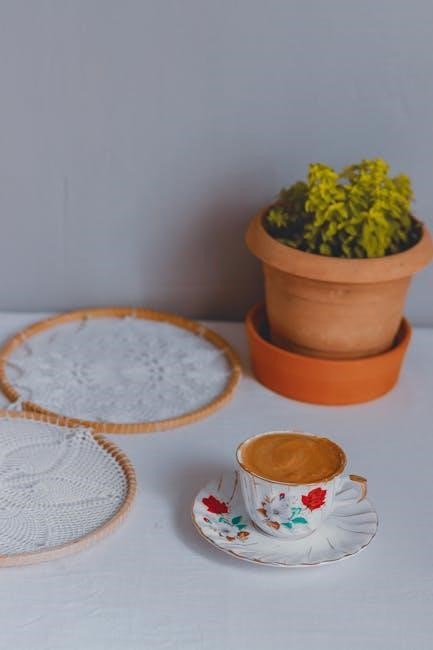
Crochet doilies are decorative fabric items made using crochet techniques, traditionally used to protect surfaces or add aesthetic appeal․ Often round or oval, they feature intricate patterns and lace-like designs․ Typically crafted with cotton or crochet thread, doilies showcase various stitches like pineapple or shell․ Their versatility allows them to suit any home decor style, making them a timeless craft project․ Free oval crochet doily patterns with written instructions are ideal for both beginners and experienced crafters․
1․2 Importance of Written Instructions in Crochet Patterns
Written instructions are essential for crochet patterns, especially for beginners, as they provide clear, step-by-step guidance․ Unlike charts or symbols, written instructions eliminate guesswork, ensuring accuracy and confidence․ They break down complex stitches and techniques, making patterns accessible to all skill levels․ For oval doilies, detailed instructions help maintain shape and symmetry, allowing crocheters to achieve professional-looking results․ This clarity enhances the overall crafting experience and fosters creativity․
Benefits of Using Free Oval Crochet Doily Patterns
Unlock endless creative possibilities with free oval crochet doily patterns․ Enjoy cost-effective crafting, versatile designs, and detailed instructions perfect for beginners and experienced crocheters alike․
2․1 Cost-Effective Crafting
Free oval crochet doily patterns offer a budget-friendly way to create beautiful home decor or gifts․ With written instructions readily available online, crafters can access high-quality designs without purchasing expensive patterns․ This accessibility makes it ideal for beginners or those on a tight budget․ Using basic yarn and hooks, you can craft stunning pieces at a fraction of the cost․ It’s a cost-effective hobby that sparks creativity and saves money․
2․2 Versatility in Design and Use
Free oval crochet doily patterns offer endless design possibilities, from classic to modern styles․ Their versatility allows crafters to customize colors, sizes, and embellishments to suit any decor or occasion․ Beyond traditional table covers, doilies can be used as wall hangings, coasters, or even gift wraps․ The written instructions ensure clarity, making these patterns accessible to both beginners and experienced crocheters․ This adaptability makes oval doilies a practical and creative addition to any crafting project․
2․3 Availability of Written Instructions for Beginners
Written instructions in free oval crochet doily patterns are a boon for beginners, offering clear, step-by-step guidance․ These instructions break down complex stitches and techniques, ensuring that even those new to crochet can follow along with ease․ Detailed descriptions and tips help prevent common mistakes, making the learning process enjoyable and stress-free․ This accessibility allows newcomers to build confidence and skills while creating beautiful doilies․
Popular Sources for Free Oval Crochet Doily Patterns
Discover free oval crochet doily patterns on platforms like Ravelry, Pinterest, and crochet forums․ These sites offer a wide range of designs with written instructions, perfect for crafters of all skill levels․
3․1 Ravelry: A Comprehensive Database for Crochet Patterns
Ravelry is a treasure trove for crocheters, offering a vast library of free oval doily patterns with detailed written instructions․ This platform serves as both a community hub and a pattern database, allowing users to search, save, and share their favorite designs․ Whether you’re a beginner or an advanced crafter, Ravelry provides an organized and user-friendly experience, making it easier to find the perfect pattern to suit your skills and style․
3․2 Pinterest: A Visual Guide to Oval Doily Inspiration
Pinterest is a visual paradise for crochet enthusiasts, offering countless ideas and inspiration for oval doily patterns․ While many pins provide images, some include links to free written instructions․ Users can create boards to organize their favorite designs, follow creators, and explore tutorials․ Though not all pins offer detailed instructions, the platform remains a valuable resource for sparking creativity and guiding your next project with its rich, visually appealing content․
3․3 Crochet Communities and Forums
Crochet communities and forums are invaluable resources for finding free oval doily patterns with written instructions․ Platforms like Crochetville and Moogly offer forums where members share patterns, tips, and troubleshooting advice․ These spaces foster collaboration, allowing crocheters to connect, learn, and inspire each other․ While not all forums provide comprehensive instructions, they often link to patterns or guide users to reliable sources, making them a great complement to your crochet journey․
Choosing the Right Oval Doily Pattern
Selecting the perfect oval doily pattern involves considering skill level, design complexity, and personal style․ Ensure the pattern aligns with your expertise and desired outcome for best results․
4․1 Patterns for Beginners
Free oval crochet doily patterns with written instructions are ideal for beginners, offering clear step-by-step guides․ These patterns often feature simple stitches and repetitive rounds, making them easy to follow․ Many designs start with basic shapes, allowing new crocheters to build confidence․ Look for patterns labeled as “beginner-friendly” or “easy” to ensure a smooth learning experience․ They are perfect for mastering foundational techniques while creating beautiful, functional pieces․
4․2 Patterns for Advanced Crocheters
For experienced crocheters, free oval doily patterns with written instructions offer intricate designs and complex techniques․ These patterns often feature advanced stitches, layered details, and creative shaping․ They provide challenges like multi-round constructions, elaborate edgings, and openwork motifs․ Detailed instructions guide through specialized methods, ensuring precision and artistry․ Ideal for those seeking to refine their skills, these patterns allow for customization and the creation of heirloom-quality pieces that showcase mastery of crochet craftsmanship․
4․3 Tips for Selecting the Perfect Design
When choosing a free oval crochet doily pattern, consider your skill level, personal style, and intended use․ Look for patterns with clear, detailed instructions and stitch diagrams․ Check reviews or completed projects for insight into complexity and results․ Opt for designs offering flexibility in size or customization․ Ensure the pattern aligns with your available materials and time commitment․ This thoughtful approach will help you select a design that brings joy and satisfaction to your crafting experience․

Materials and Tools Required for Crochet Doilies
Crochet hooks, yarn, tapestry needle, scissors, and stitch markers are essentials․ Choose appropriate hook sizes and yarn types for your doily pattern to ensure the best results․
5․1 Recommended Yarn Types for Doilies
Cotton or mercerized cotton yarns are ideal for doilies due to their smooth texture and durability․ Lace or fingering weight yarns are perfect for intricate designs, while medium-weight yarns offer stability․ Choose yarns with good stitch definition to highlight patterns․ Consider fiber content, weight, and color to match your desired aesthetic․ Smooth, non-fuzzy yarns are best for visibility of stitches․ Always check the yarn’s absorbency if the doily will be used in functional settings․
5․2 Crochet Hook Sizes for Oval Shapes
Choosing the right crochet hook size is crucial for achieving the perfect oval shape․ Typically, hooks range from 2․0mm to 5․0mm, depending on the yarn weight and desired texture․ Steel or aluminum hooks are ideal for precision․ To maintain consistency, ensure the hook size matches the yarn weight specified in the pattern․ Experimenting with hook sizes can adjust the doily’s size and density, ensuring a balanced and professional finish for your oval design․
5․3 Additional Tools: Tapestry Needle, Scissors, and Stitch Markers
A tapestry needle is essential for weaving in yarn ends neatly․ Sharp scissors are a must for cutting yarn accurately․ Stitch markers help track patterns and maintain symmetry, especially for intricate oval designs․ These tools ensure a polished finish and simplify the crocheting process, making your doily projects more enjoyable and professional-looking from start to finish․
Understanding Basic Stitches for Oval Doilies
Mastering basic stitches like chain, single crochet, double crochet, and slip stitch is crucial for creating a solid foundation in oval doily patterns․ These stitches are essential for building intricate designs and ensuring a smooth crocheting process․
6․1 Chain Stitch (ch)
The chain stitch is the foundation of most crochet projects, including oval doilies․ It creates a series of connected loops that form the base for other stitches․ To make a chain stitch, insert the crochet hook into the stitch, yarn over, pull the yarn through, and repeat․ This simple stitch is essential for starting your project and shaping the oval form․ Practice ensures even tension for a professional finish․
6․2 Single Crochet (sc)
The single crochet (sc) is a fundamental stitch in crochet, creating a soft, fabric-like texture․ To work an sc, insert the hook into the stitch, yarn over, pull up a loop, yarn over again, and pull through both loops․ This stitch is ideal for beginners and is often used in oval doilies to build up the design․ It’s versatile and works well for both intricate and simple patterns․ Maintaining even tension is key for a polished finish․
6․3 Double Crochet (dc)
The double crochet (dc) is a popular stitch that adds height and texture to your work; To create a dc, yarn over, insert the hook into the stitch, yarn over again, pull up a loop, yarn over, and pull through both loops on the hook․ This stitch is versatile and commonly used in doilies for creating intricate patterns and adding dimension․ It’s essential to maintain consistent tension to ensure even fabric, especially in oval shapes․ Perfect for both beginners and advanced crocheters, the dc stitch is a cornerstone of many free doily patterns․
6․4 Slip Stitch (sl st)
The slip stitch (sl st) is a fundamental stitch used to join two pieces of crochet work or to fasten off a project․ To create a slip stitch, insert the crochet hook into the specified stitch, yarn over, and pull the yarn through both the stitch and the loop on the hook․ This stitch is essential for seamlessly joining rounds in oval doilies, ensuring a professional finish․ It’s quick to learn and often used in free patterns to complete projects neatly․ Practice this stitch to master the art of invisibly joining your doily rounds․
Advanced Stitches for Intricate Doily Designs
Explore advanced stitches like pineapple, shell, and V-stitch to create intricate oval doily designs․ These patterns offer elegance and complexity, with written instructions for mastery․
7․1 Pineapple Stitch for Classic Doilies
The pineapple stitch is a timeless choice for creating classic doilies․ Its textured, repeating pattern adds elegance to any oval design․ With written instructions, even beginners can master this stitch, achieving a vintage look perfect for home decor or gifts․ Free patterns often feature this stitch, making it accessible for all skill levels․ It’s a must-try for those seeking intricate yet traditional designs․
7․2 Shell Stitch for Elegant Patterns
The shell stitch is a popular choice for creating elegant and intricate oval doilies․ It involves working multiple stitches in one stitch, forming a shell-like texture․ This stitch adds a classic, sophisticated look to doilies, making them perfect for home decor or gifts․ Free patterns with written instructions make it easy for crocheters of all levels to achieve this timeless design․ The shell stitch is ideal for those seeking a balance of beauty and simplicity․
7․3 V-Stitch for Openwork Designs
The V-stitch is a versatile crochet stitch that creates open, airy patterns, making it ideal for delicate oval doilies․ This stitch involves working two double crochet stitches with a chain in between, forming a “V” shape․ It adds a light, lace-like texture to doilies, enhancing their elegance․ Free patterns with written instructions guide crocheters through mastering the V-stitch, ensuring even beginners can create intricate, openwork designs for both traditional and modern decor․
Step-by-Step Instructions for Making an Oval Doily
Start by gathering materials like yarn, a crochet hook, and scissors․ Follow the written instructions to create a foundation chain, work in rounds, and shape the oval․ Finish neatly․
8․1 Starting the Foundation Chain
To begin your oval doily, start by creating a foundation chain․ This chain sets the base for your project and ensures a professional finish․ Choose the right yarn and hook size, then hold the hook comfortably․ Insert the hook into the stitch, pull up a loop, and draw it through․ Count your stitches carefully to maintain accuracy․ Keep the chain slightly loose to allow for smooth stitching․ A well-made foundation chain is essential for achieving the desired oval shape and pattern clarity․
8․2 Working in Rounds for an Oval Shape
To achieve an oval shape, work in rounds, starting from a central ring․ Use a stitch marker to track the beginning of each round․ Increase stitches on one side while keeping the other side even, creating a gradual curve․ Maintain consistent tension to ensure symmetry․ Follow the pattern closely, as specific increases and decreases guide the oval form․ Use stitch markers to mark symmetry points and turn work at the end of each round for a seamless shape․
8․3 Adding Layers for Complexity
Add layers to your oval doily for a more intricate design․ Begin with a basic round, then build complexity by adding subsequent layers․ Use stitches like pineapple or shell to enhance texture and visual appeal․ Follow written instructions to ensure proper stitch placement and alignment․ Each layer should complement the previous one, creating depth and dimension․ This step allows for customization, such as incorporating beads or color changes, making your doily uniquely beautiful and personalized․ Attention to detail is key for a polished finish․
8․4 Finishing Touches: Weaving in Ends and Blocking
Complete your oval doily by carefully weaving in all yarn ends with a tapestry needle․ This step ensures a neat, professional finish․ Next, block your doily to enhance its shape and texture․ Wet or steam block by pinning it to a flat surface, allowing it to dry completely․ Blocking reveals the stitch details and gives your doily a polished look․ Follow written instructions for specific blocking tips to achieve the best results and maintain the oval shape․
Common Mistakes to Avoid When Crocheting Doilies
Avoid common mistakes like incorrect stitch counts, uneven tension, and misreading written instructions․ These errors can distort the doily’s shape and appearance, so attention to detail is crucial․
9․1 Incorrect Stitch Count Leading to Shape Issues
Incorrect stitch counts are a common mistake that can severely distort the shape of your doily․ Too few or too many stitches can make the oval uneven or misshapen․ Always double-check your foundation chain and each round to ensure accuracy․ Small errors early on can magnify as the project grows, leading to a lopsided finish․ Pay close attention to written instructions and use stitch markers to stay on track for a perfectly shaped doily․
9․2 Tension Problems: Too Tight or Too Loose
Tension issues can ruin the appearance of your doily․ Crochet that’s too tight may cause puckering or stiffness, while work that’s too loose can result in a floppy, misshapen design․ Maintaining consistent tension is crucial for achieving the desired oval shape․ Check your stitches regularly and adjust your hook size if necessary․ Blocking your finished doily can help correct minor tension issues, ensuring a smooth, even finish․ Practice makes perfect in achieving the right balance․
9․3 Misreading Written Instructions
Misreading written instructions is a common mistake that can lead to errors in your doily’s pattern․ Always take the time to carefully read and understand each step before crocheting․ Pay attention to stitch counts, abbreviations, and special techniques․ Using stitch markers can help you stay on track․ Double-checking your work as you go ensures accuracy․ Remember, crochet patterns are precise, and even small misreadings can alter the final shape․ Stay patient and vigilant for the best results․

Tips for Customizing Your Oval Doily
Personalize your oval doily by experimenting with colors, yarn weights, and embellishments․ Add beads or lace for extra flair․ Adjust sizes or shapes to suit your decor․
10․1 Changing Colors for Unique Designs
Transform your oval doily into a one-of-a-kind piece by experimenting with color changes․ Use vibrant hues to match your home decor or seasonal themes․ Gradient effects can add depth, while subtle shifts create a soft, ombre look․ Written instructions often include tips for seamless color transitions, ensuring your project stays cohesive and visually striking․ This simple technique can elevate your doily from basic to extraordinary․
10․2 Adding Beads or Embellishments
Elevate your oval doily by incorporating beads or embellishments for a touch of elegance․ Beads can be crocheted directly into the pattern or added afterward for intricate details․ Written instructions often include tips on placement and technique․ Sequins, appliques, or even buttons can also enhance the design․ These additions make your doily truly unique, perfect for gifts or home decor, and showcase your creativity․
10․3 Adjusting Size for Different Uses
Customize your oval doily by adjusting its size to suit various purposes․ Patterns often allow for easy modification by adding or reducing rounds or stitches․ This flexibility enables you to create doilies for coasters, table covers, or decorative wall hangings․ Written instructions provide guidance on scaling, ensuring your project fits your desired use․ Whether small and delicate or large and statement-making, your doily can be tailored to enhance any setting or gift․
Displaying and Using Your Finished Doily
Showcase your handmade oval doily as a decorative piece or functional item․ Use it as a coaster, table centerpiece, or wall hanging to add charm to any room․
11․1 Home Decor: Table Covers, Wall Hangings, and More
Oval crochet doilies add a touch of elegance to any room․ Use them as table covers, wall hangings, or coasters to protect surfaces and enhance decor․ Their versatile design makes them perfect for placing under vases, lamps, or as a centerpiece․ Doilies can also be used to add a vintage charm to furniture or as a decorative accent in seasonal displays․ They make thoughtful gifts and can be customized to match various home styles and themes․
11․2 Gift Ideas: Personalized Presents for Friends and Family
Oval crochet doilies make thoughtful, personalized gifts for loved ones․ Their handmade charm adds a heartfelt touch to any present․ Customize them with colors or patterns that match the recipient’s style․ Doilies are perfect for holidays, birthdays, or anniversaries․ They can be used as decorative pieces, functional table covers, or even framed as wall art․ Handmade gifts like these are treasured for their uniqueness and the love invested in each stitch․
11․3 Seasonal Decor: Themed Doilies for Holidays
Add a festive touch to your home with themed oval crochet doilies for holidays․ Customize them using seasonal colors and patterns, such as red and green for Christmas or pastels for Easter․ These doilies can be used as table decorations, wall hangings, or even as gifts․ Their intricate designs and handmade charm bring a personal and unique flair to any holiday setting, making them a versatile and heartfelt addition to your seasonal decor․
Free oval crochet doily patterns with written instructions offer endless creativity and convenience․ Explore, craft, and enjoy these beautiful designs, perfect for enhancing your home decor or gifting loved ones․
12․1 Recap of Key Points
Free oval crochet doily patterns with written instructions are widely available, offering cost-effective and versatile crafting options․ These patterns cater to both beginners and advanced crocheters, providing clear guidance for creating beautiful, functional, and decorative pieces․ Popular platforms like Ravelry and Pinterest serve as excellent resources, while communities and forums offer additional support․ With these patterns, you can craft stunning doilies for home decor, gifts, or seasonal themes, all while refining your crochet skills and creativity․
12․2 Encouragement to Start Your Next Project
With the wealth of free oval crochet doily patterns and written instructions available, it’s never been easier to embark on your next creative journey․ Whether you’re a beginner or an experienced crafter, these patterns offer a fun and rewarding way to transform yarn into beautiful, functional pieces․ Don’t hesitate—pick a design, gather your materials, and start crocheting! Remember, every stitch brings you closer to a finished masterpiece․ Share your creations online, and enjoy the pride and joy of handmade crafting․