
A seam guide is a tool or marking on a sewing machine that helps sewists achieve straight, consistent stitches. It enhances accuracy and saves time, especially for quilting and straight seams, by providing clear alignment references. Available in magnetic, screw-on, or adhesive forms, seam guides are essential for precise stitching. They are simple to use and customizable, making them indispensable for both beginners and experienced sewists.
1.1 What is a Seam Guide?
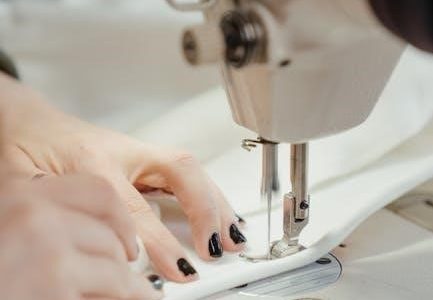
A seam guide is a tool or feature on a sewing machine designed to help sewists maintain consistent seam allowances. It can be a physical attachment, such as a magnetic or screw-on guide, or markings etched into the needle plate. These guides provide visual references, ensuring fabric aligns correctly for straight stitching. They are especially useful for quilting and projects requiring precise seams. By using a seam guide, sewists can achieve uniform stitch widths and avoid uneven edges. This simple yet effective tool enhances sewing accuracy and efficiency, making it an essential aid for both beginners and experienced sewists. It is a versatile accessory that adapts to various projects, ensuring professional-looking results.
1.2 Importance of Using a Seam Guide in Sewing
Using a seam guide is crucial for achieving professional-quality stitching in sewing. It ensures consistent seam allowances, reducing errors and the need for ripping stitches. This tool is especially vital in quilting, where precise alignment is essential for pattern accuracy. A seam guide also saves time by eliminating the need for frequent measuring, allowing sewists to focus on creativity. It aids in maintaining straight lines, which is particularly helpful for beginners. Additionally, it prevents fabric from shifting during stitching, ensuring even hems and seams. By minimizing mistakes and enhancing efficiency, a seam guide becomes an indispensable asset for sewists of all skill levels, promoting better results and boosting confidence in their work.
1.3 Brief History of Seam Guides in Sewing Machines
The concept of seam guides dates back to the early days of sewing machines, with basic markings on needle plates to help sewists align fabric. Early machines featured simple etched lines for seam allowances, providing minimal guidance. As sewing technology advanced, manufacturers introduced more sophisticated seam guides, including magnetic and screw-on attachments. The mid-20th century saw the rise of specialized guides like the 1/4-inch foot, revolutionizing quilting. Modern innovations include adjustable and customizable options, catering to diverse sewing needs. These tools have evolved to enhance precision and efficiency, making sewing more accessible and enjoyable for both hobbyists and professionals.
Types of Seam Guides Available
Seam guides come in various forms, including magnetic, screw-on, adhesive, and quilting guide bars. Each type offers unique benefits, catering to different sewing needs and machine compatibility.
2.1 Magnetic Seam Guides
Magnetic seam guides are a popular choice for their ease of use and versatility. They attach securely to the sewing machine’s needle plate or surrounding area, providing a clear guide for fabric alignment. These guides are especially useful for maintaining consistent seam allowances, particularly in quilting and straight-line sewing projects. Unlike screw-on guides, magnetic ones can be easily moved or removed without damaging the machine. They often feature markings for common seam allowances, such as 1/4 inch or 1/2 inch, making them ideal for precision work. Their adjustable nature allows sewists to customize the guide’s position based on the project’s requirements, ensuring accurate and professional results. Magnetic seam guides are a must-have for sewists seeking convenience and flexibility.
2.2 Screw-On Seam Guides
Screw-on seam guides are durable attachments that securely fasten to the sewing machine, offering precise control for consistent seam allowances. They are ideal for projects requiring stability, such as quilting or heavy-duty sewing. These guides are typically adjustable, allowing users to set specific widths for accurate stitching. Unlike magnetic guides, screw-on versions are less likely to shift during use, ensuring straighter lines. They are compatible with various machine models and can be customized for different seam widths. Screw-on guides are a reliable choice for sewists who value stability and precision in their work. Regularly tightening the screws ensures optimal performance and prevents misalignment during sewing sessions. They are a versatile tool for achieving professional-grade results.
2.3 Adhesive Seam Guides
Adhesive seam guides are a convenient and easy-to-install option for sewists. They feature a strong adhesive backing that securely attaches to the sewing machine’s needle plate or surrounding area. These guides are ideal for those who prefer a tool that stays in place without additional hardware. Adhesive seam guides are often adjustable, allowing users to set specific seam allowances for various projects. They are lightweight, portable, and compatible with most sewing machines. However, care must be taken to avoid leaving residue or damaging the machine’s finish. Adhesive guides are a practical choice for sewists who want a simple, non-permanent solution for straight stitching. They offer versatility and ease of use, making them a popular choice for both beginners and experienced sewists. Always ensure proper alignment before use for optimal results.
2.4 Quilting Guide Bars
Quilting guide bars are specialized attachments designed to assist in sewing straight lines, particularly for quilting projects. These bars attach to the sewing machine, often via the presser foot or a specific mount, and provide a stable guide for the fabric. They are especially useful for achieving consistent 1/4-inch seams, a common requirement in quilting. Some models, like the BERNINA Walking foot, come with built-in guide bars for added precision. Quilting guide bars are easy to install and adjust, making them a favorite among quilters. They are ideal for piecing, stitching in the ditch, or any project requiring straight, even stitching. Compatible with most sewing machines, these guides enhance accuracy and streamline the quilting process.
Understanding the Needle Plate Seam Allowance Guides
The needle plate features etched seam allowance guides, helping sewists align fabric for straight seams. Customize with tape for precision stitching and consistent results.
3.1 What is a Needle Plate?
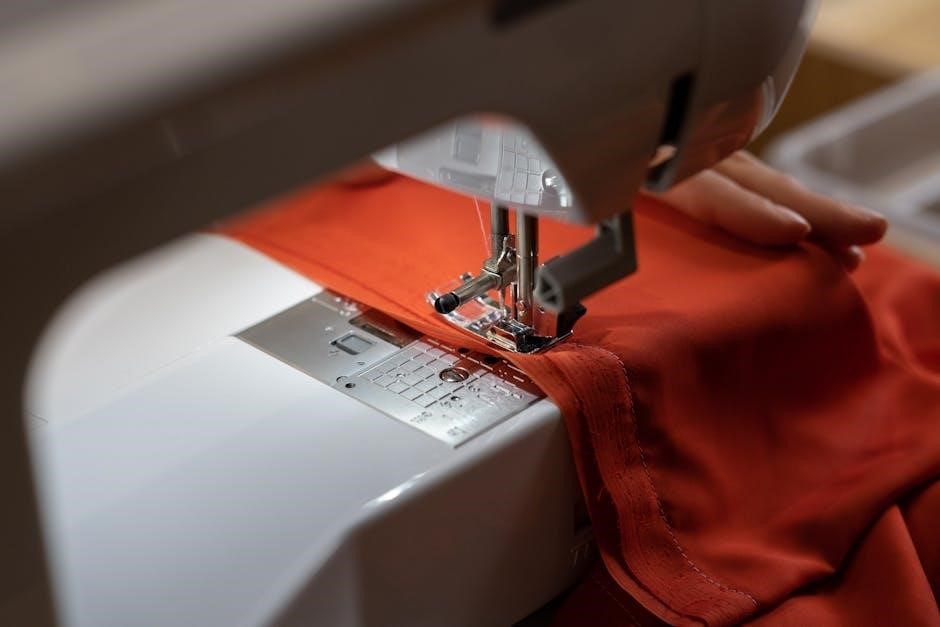
The needle plate, often called the throat plate, is a metal piece located below the sewing machine’s needle and presser foot. It features holes for the needle to pass through and etched guides for seam allowances. These markings help sewists align fabric edges for straight stitching. Some plates have vertical, horizontal, and diagonal lines, aiding in precise seam allowances. Customizable with tape, the needle plate is a crucial feature for achieving accurate stitches. It’s essential for both basic sewing and complex projects, ensuring consistency and professionalism in every stitch. Understanding the needle plate enhances sewing efficiency and overall project quality.
3.2 Identifying Seam Allowance Markings
Seam allowance markings are etched lines or numbers on the needle plate, guiding fabric alignment for consistent stitching. These markings indicate distances from the needle, helping maintain accurate seam allowances. They are often vertical, horizontal, or diagonal, depending on the machine. For example, a 1/4-inch mark helps quilters achieve perfect seams. If your machine lacks these markings, you can add custom guides using tape or markers. These tools are essential for straight stitching and professional results, ensuring every project meets precise standards. By using these markings, sewists can achieve consistent, professional-quality seams with ease. They are a fundamental feature for both beginners and experienced sewists alike.
3.3 How to Use the Throat Plate for Straight Seams
The throat plate, or needle plate, features etched seam allowance guides to help sew straight lines. To use it, align the fabric edge with the desired marking on the plate. For example, use the 1/4-inch line for quilting or the 1/2-inch mark for general sewing. Ensure the fabric is smooth and evenly positioned under the presser foot. As you sew, keep the fabric moving steadily, using the guide to maintain alignment. For curves or corners, pause to adjust the fabric direction while keeping the edge aligned. Optional tools like magnetic guides or tape can enhance accuracy. This method ensures precise, straight seams every time, making it ideal for both beginners and experienced sewists. Consistent use of the throat plate guides will improve your sewing results significantly.
How to Use a Seam Guide Effectively
Align fabric edges with the seam guide, adjust for desired allowances, and maintain steady fabric flow. Use the presser foot as a reference for straight, consistent stitching.
4.1 Aligning Fabric with the Seam Guide
Aligning fabric with a seam guide ensures precise stitching. Place the fabric under the presser foot, matching the edge to the guide. For straight seams, use the etched markings on the needle plate or attach a magnetic guide. Secure fabric with pins if needed. Gently guide the fabric along the edge of the guide without pulling. This method is especially useful for quilting and straight-line stitching, ensuring consistent seam allowances. Keep the fabric steady and maintain a smooth flow to achieve professional results.
4.2 Adjusting the Seam Guide for Different Seam Allowances
Adjusting the seam guide allows for precise control over seam allowances. For magnetic guides, slide them along the needle plate to the desired width. Screw-on guides are adjusted by loosening the screw, setting the width, and tightening it back. Use a ruler to ensure accuracy. For custom allowances, mark the fabric edge with a permanent marker or attach additional guides. This flexibility is ideal for varying project needs, ensuring consistent results. Always test the adjustment on scrap fabric before sewing to confirm the width. Proper alignment and adjustment are key to achieving professional-looking seams. By fine-tuning the guide, you can master any seam allowance required for your projects.
4.3 Tips for Sewing Straight Lines with a Seam Guide
Using a seam guide effectively requires proper alignment and smooth fabric movement. Start by aligning the fabric edge with the guide, ensuring it remains straight as you sew. Keep the fabric taut but not pulled, allowing the machine to feed it naturally. For magnetic or screw-on guides, position them slightly ahead of the needle to maintain a consistent line. Use the edge of the fabric as a visual reference to keep the seam straight. Avoid sudden movements, as they can disrupt the alignment. For curves, set a turning point by aligning the guide with the needle. Practice on scrap fabric to refine your technique, ensuring precise, professional results every time.

Customizing Your Seam Guide
Customizing your seam guide is easy! Use tape for a perfect fit, or permanent markers for custom markings. Magnetic or screw-on guides offer flexibility for any machine type.
5.1 Making Your Own Seam Guide with Tape
Creating a custom seam guide with tape is a simple and effective solution. Use Washi tape or painter’s tape to mark straight lines on your sewing machine’s needle plate. Place the tape along the desired seam allowance, ensuring it aligns with the edge of your fabric. This method is perfect for machines without built-in guides. The tape is easy to remove and reposition, making it ideal for various projects. For accuracy, align the tape with the needle’s position and adjust as needed. This DIY approach is cost-effective and allows for personalized seam allowances, ensuring straight, consistent stitches every time. It’s a great alternative for sewists who prefer a removable and adaptable guide.
5.2 Using Permanent Markers for Custom Markings
Using permanent markers to create custom seam guide markings is a quick solution for consistent stitching. Simply draw lines on the needle plate where needed, ensuring they align with your desired seam allowances. This method offers durability and visibility, ideal for frequent use. However, it’s important to note that permanent marks are difficult to remove, so plan carefully before marking. For accuracy, use a ruler to draw straight lines. While this method is effective, it’s less flexible than tape or magnetic guides. Despite this, it remains a popular choice for sewists who prefer permanent, visible references; Always test the marker on a small area first to ensure it doesn’t damage your machine’s finish.
5.3 Magnetic vs. Screw-On Seam Guides: Which is Better?
Magnetic and screw-on seam guides offer distinct advantages for sewists. Magnetic guides are easy to install and adjust, making them ideal for quick projects and varying seam allowances. They are removable and reusable, offering flexibility without damaging the machine. Screw-on guides, however, provide stability and precision, especially for heavy-duty sewing or large projects. They are more permanent but require tools for adjustment. Magnetic guides are better for versatility and ease, while screw-on guides excel in durability and consistency. Choose based on your sewing needs: magnetic for convenience and screw-on for long-term reliability and stability in demanding tasks.
Advanced Techniques with Seam Guides
Master advanced sewing techniques by using seam guides for curves, quilting, and intricate stitching. Learn to set turning points and maintain precision for professional-grade projects with ease.
6.1 Sewing Curves with a Seam Guide
Sewing curves with a seam guide requires precise alignment and control. To achieve smooth curves, position the seam guide behind the needle, aligning its edge with the fabric’s curve. Draw a line along the gauge to mark the turning point. This ensures the fabric moves evenly, maintaining consistent stitches. For intricate curves, use smaller stitch lengths and slow machine speed. The seam guide helps navigate fabric smoothly, preventing distortions. Practice on scrap fabric to master this technique, ensuring professional-looking results in quilting or garment sewing projects.
6.2 Using a Seam Guide for Quilting Projects
A seam guide is invaluable for quilting, ensuring precise, straight lines and consistent seam allowances. Attach the guide to align fabric edges effortlessly, maintaining accuracy across large projects. Magnetic or adhesive guides work well, while quilting guide bars offer extended reach. Use the guide to keep fabric steady, preventing drift and uneven stitching. It’s especially useful for long seams and intricate patterns, saving time and reducing frustration. By maintaining consistent alignment, the seam guide helps achieve professional-looking quilts with ease, making it an essential tool for quilters of all skill levels.
6.3 Setting the Turning Point for Curves
When sewing curves, setting the turning point is crucial for smooth transitions. Align the seam guide with the machine needle, ensuring the guide’s edge matches the fabric’s edge. Mark the turning point on the fabric using a ruler or pencil, then position the fabric so the mark aligns with the needle. Lower the presser foot and sew slowly, guiding the fabric along the seam guide. This technique ensures precise curves and consistent stitching. For intricate patterns, use a smaller stitch length near the turning point for better control. Properly setting the turning point enhances the overall quality of curved seams in quilting and other projects.
Maintenance and Care of Seam Guides
- Clean the needle plate regularly with a soft cloth to prevent debris buildup.
- Store seam guides in a dry place to avoid rust or damage.
- Check for alignment issues and tighten loose attachments promptly.
7.1 Cleaning the Needle Plate
Cleaning the needle plate is essential for maintaining your sewing machine’s performance. Start by turning off and unplugging the machine for safety. Use a small, dry brush to gently sweep away loose debris like thread fragments or lint. For more stubborn dirt, dampen a cotton swab with water or isopropyl alcohol and carefully wipe the surface, avoiding any openings. Never use harsh chemicals or abrasive materials, as they can damage the finish. After cleaning, use a soft, dry cloth to remove any moisture and residue. Regular cleaning prevents buildup and ensures accurate seam guides function properly. Always refer to your machine’s manual for specific cleaning instructions to avoid damage.
7.2 Storing Seam Guides Properly
Proper storage of seam guides is crucial to maintain their functionality and longevity. Magnetic seam guides should be kept away from metal objects to prevent demagnetization and stored in a protective case or pouch. Screw-on guides should be placed in a designated compartment or small container to avoid scratching or bending. Adhesive guides should be stored in their original packaging or wrapped in a soft cloth to protect the adhesive surface from dust and moisture. For custom guides, such as those made with tape, store them in a dry, clean environment to prevent the tape from losing its adhesive properties. Always keep seam guides organized and secure to ensure they remain in good condition and are easily accessible when needed.
7.3 Troubleshooting Common Issues
Common issues with seam guides include misalignment, loss of adhesion, or magnet strength reduction. If a magnetic guide loses grip, clean the needle plate to ensure proper contact. For adhesive guides, avoid exposure to heat or moisture, which can weaken the bond. If a screw-on guide loosens, tighten it gently but firmly. For inaccurate stitching, check the guide’s alignment with the needle and fabric edge. If using tape for custom guides, ensure the surface is clean and dry for better adhesion. Regularly inspect guides for wear and tear, replacing them if necessary. Proper maintenance and quick fixes can extend the life of your seam guides and ensure consistent results.
Mastering the seam guide enhances sewing accuracy and efficiency. Practice regularly, experiment with different types, and explore customization options to refine your skills and expand creativity.
8.1 Summary of Key Points
A seam guide is an essential tool for achieving straight, consistent stitches on a sewing machine. It comes in various forms, including magnetic, screw-on, and adhesive options, each offering unique benefits. Proper alignment of fabric with the guide ensures accurate seam allowances, while customization options like tape or markers allow for personalized adjustments. Regular maintenance, such as cleaning the needle plate and storing guides properly, prolongs their effectiveness. Troubleshooting common issues, like misalignment or worn markings, helps maintain sewing precision. By mastering these techniques, sewists can enhance their projects’ quality and efficiency, making the seam guide an indispensable asset for both beginners and experienced crafters.
8.2 Encouragement to Practice and Experiment
Don’t hesitate to practice and experiment with your seam guide—it’s key to mastering straight, precise stitches. Start with scrap fabric to build confidence and refine your technique. Try different types of guides, such as magnetic or adhesive, to see which works best for you. Experimenting with various seam allowances and fabrics will help you understand how the guide adapts to different projects. Remember, even small adjustments can make a big difference in your results. Don’t be afraid to make mistakes—they’re part of the learning process. With patience and practice, you’ll achieve professional-looking seams and unlock new creative possibilities. Happy sewing!